Saturday, March 9, 2013

The Artifact: Environmental Foundry Processes


The Artifact 

My idea of what an artifact is comes from the Oxford English Dictionary definition of "artifact" which is described as "an object made or modified by human workmanship, as opposed to one formed by natural processes" or "an excavated object that shows characteristic signs of human workmanship or use." For the purposes of the assignment I chose to define an artifact as anything with human influence. If a human has made it, altered it, picked it up and used it for a specific purpose, it’s an artifact in line with my personal definition of the word. 

For the artifact assignment I chose to focus on using the hand in order to produce forms that allude to function. I am interested in the idea of excavating an object and not knowing exactly was it was used for, but finding clues of it’s function by looking at its different aspects. If 1,000 years from now my artifacts were found, what kind of function could they imply? How can I make something that looks like it might be used for a certain purpose, but also have ambiguity to any such purpose? In addition to this, I am also interested in the process of making and how I can reference that process in the final form. By using the hand(s) as a basis for my artifacts I’m leaving an imprint of the wax process of making in the final metal cast. The dung and clay method of molding is very supportive of the reference to the hand, since it is such an involved process. The steps of sifting the dung, mixing the different layers of the mold and then layering them onto my wax pattern is so integral to my interest in the hand and how the hand is involved in the making process. 

I enjoy the dung and clay mold process. It’s relaxing and it’s a lot different in doing a shell or sand mold. There is a variable of time that you have to account for. Different molds take a different drying time and you have to know by feel when you should add the next layer and whether it’s to wet or too dry. I’ve been having a lot of cracking happening during the final drying out of the mold and I think this is because I’ve been going to fast in adding the next layer to my molds. Since some of my molds cracked, I’ve also had a lot of flash in and I even had a mold bust open and let all of the molten bronze out of it before it could cool. This was upsetting, but I may have been pushing the limits of the dung mold process because this mold was almost as large as a football, albeit a hollow form. 


The Research 

I did research on some different types of artifacts and I was most interested in Native American and Viking tools and ceremonial objects. I thought that these provided the most interesting forms that didn't necessarily connect completely to their main function. I sketched my favorite forms here: 


The Process 

To make the wax version of the artifact I used warm wax, that was the consistency of silly putty, and molded the wax around different parts of my hands/arms. For my largest mold, I pressed the wax around my hand to create a sort of pouring container. For the smaller molds I used the tip of my fingers to create a recess into the wax form. After the pieces were sprued, vented and attached to a cup, the layers of dung and clay mixture were added.  

The imprint of my hand was on the interior of the form.
The wax was pressed onto the top and sides of my hand.  
The wax that was molded over my hand.
This is the outside of the form. 


Once the dung molds were finished being layered, they were left to dry out until the melt out kiln. The melt out charcoal kiln was also a very cool process. I never imagined that this kiln could be set up so easily. You could do this whole process in your backyard if you wanted to. I was very surprised that there was so much smoke from the kiln. I’m unsure if this was due to the moisture still left in the molds, the burning of the charcoal or the melting wax catching on fire. Or maybe it was a combination of all three of these. After the molds are cast and cooled for a few hours they can be carefully broken open. The pieces of used mold can be crushed and recycled by sieving it through the different sized sieves. 

The charcoal wax melt out kiln.
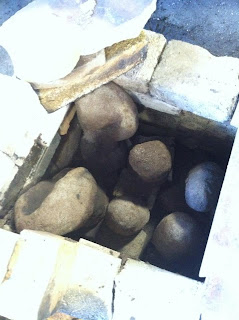
Larger molds are placed in the back to maximize efficiency. 
These small forms were the wax forms
molded around my fingertips. They cast
extremely well. No vents were needed because
the clay/dung molds are fairly porous after the dung
is burned away in the melt out process. 
This was the form that was molded around my
 hand. It was the largest mold I tried to do.
It broke open before the molten bronze could
completely cool, so it only cast half-way. 

In the remainder of the semester, when the weather gets a little better, I would like to try making a kiln out of the dung/clay paste and see if this perhaps might keep more heat in. I am excited to see what I can make next. I would like to try making small intricate pieces, perhaps jewelry items, using swirls and twists of wax like the ancient Africans did using beeswax to make bronze jewelry. 

An example of an intricate ancient African pendent.
I would like to attempt some of these
forms in the near future. 
Ancient African method of bronze casting: http://www.metmuseum.org/toah/hd/wax/hd_wax.htm 


The Vessel 

The ancient Japanese method of sogata clay molding is very difficult for me. I didn’t really know what I was doing half of the time and I wasn’t sure if I was doing something wrong and if I was I had no idea how to fix it. But finally I got the first half of the piece mold finished. What I’ve learned is that you need the clay to be the right consistency when working with it because if it’s too wet it will all just gather at the bottom of your mold and if it’s too dry it won’t stick to your previous layer. But the water content in the mold mixture also depends on which layer you are working on. For the coarser material wetter might be better so it will stick to the previous layer, but it’s difficult to defy gravity with wetter clay. So if you need to cut back in with your mold you need to do that layer in parts so the clay that’s cutting back in has a chance to dry so it won’t collapse due to gravity. Also with a form that cuts back in on itself it’s very difficult to fit your hand into the flask to put on the layers of clay. You really just end up always hitting part of the clay you’ve already smoothed over. I’ve definitely learned to make patterns that do not cut back in on themselves because it was so frustrating doing that type of pattern for the first time doing a sogata mold.  

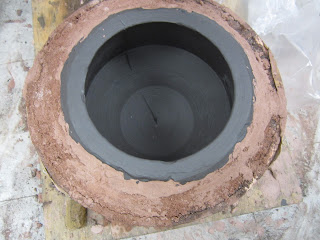
The finished first half of the sogata mold. 

The workstation set up of the sogata molding process. 


Patination 

I haven’t had much of a chance to patina metal in past projects, but I am excited to experiment with different color patinas. I would like to produce/find a patina that makes bronze look aged (say for 1,000 years) and I would also like to look for patinas that are brightly colored. For patination I am most interested in finding “natural” patinas that do not necessarily involve super toxic chemicals that I may not be able to get my hands on in the future when I’m on my own. The other reason I’m interested in natural patinas is because I don’t necessarily like to work with toxic chemicals and since the sogata and the dung and clay molding processes are natural processes without any toxic chemicals I think it would be good to use natural patinas. 


Friday, March 8, 2013

Artifact Research: Monuments/Statues


Monument/Statue Research:

The main focus of my research for the 'Artifacts' portion of Environmental Foundry is on monuments and their meaning.  I'm very interested in the different purposes for monuments and how their aesthetic correlates with their meaning. The first three monuments that I've created all have different purposes: worship, the representation of a historical event (ambiguous), and remembrance of the dead. The goal that I want to achieve with making these artifacts is to make them appear a lot larger than their actual size.  To do this I will take photos of the finished artifacts, bring them into photoshop and appropriate people or wildlife near them to exaggerate size. 

Sketches for the three statues:


North Korean 'eternal president' statues (historical/worship)


- Here are multiple examples of different statues used for different purposes.  

-Kim Jong-il bronze statue 

-A tribute to Kim Jong-il, reportedly penned by the state-run Korean Central News Agency after his death, hailed the North Korean leader's "threadbare and discolored" parka as a "symbol of revolution".

- Looking at this photo of the famous Korean Leader, it makes me think about how people stand and act in front of certain statues.    Typically for worship people face the front of the figure or front face of the statue.  Also the placement of different statues can change the context completely.

Lao Tse Statue

- "In Taoism, to embrace the totality while doing an everyday mundane task means you never leave the totality regardless of the action you might undertake. This is the principle of shou-yi, which is extremely difficult to do."


Example of photo manipulation: In a previous assignment I had fooled around with size alterations on photoshop and tried to push the limits of how believable I could make my hand sculptures.
Original photo of landscape at SAW
Photo of cast iron hand
Finished photo manipulation
Developing Environmental Molds:


First layer of dung mixture


Final Layer with coarse grog


After the kiln has been set up, the molds are placed inside with gaps underneath to allow the wax to melt out the bottom.  Charcoal is placed around the molds built up to the roof of the kiln then kiln shelves are placed on top to keep the heat trapped inside.


Kiln reaching max temperature without blower.


After the molds are heated up to the right temperature so that they are glowing red, they are ready to be poured.

Finished molds before cracking them out.


Thursday, March 7, 2013

Surfaces: Ancient and Contemporary


    It’s easy to dismiss traditional methods of metalworking as primitive and crude in light of the incredible advances in materials processing techniques both on the industrial scale and at the level of the humble craftsman.  However, now that environmental consciousness, reduction of the use of harmful chemicals, materials recycling, and other altruistic values have become fashionable, the methods of the ancient metal caster have once again become contemporary.  The use of clay over resin bonded sand and natural oils and solutions over complex chemistries now give these methods an advantage over what was considered to be “advanced” techniques.  My focus for this course is to investigate and experiment with methods of surface treatment and patination of cast metals used by ancient craftsmen and try to integrate those techniques into my own work.

    The patterns I designed for myself are geometrically simple so I can focus on the surface of each piece.  I molded two patterns out of wax and molded each in dung and clay.  They were both cast in bronze.

Bronzes from Dung Molds

  
    In keeping with attempts to use both contemporary and contemporary methods of making, I used 3D modeling (Rhinoceros 3.0) to design a sweep for the Japanese Sogata technique of making vessels.  I enjoy the idea of using such a technologically sophisticated technique and traditional mode of making in tandem.

Sogata Mold and Rendering


    My research into surface techniques has been fruitful.  Not many sources look at surface treatment and patination of metals with a historical perspective, but I was able to get my hands on a copy of “Metal Plating and Patination: Cultural, Technical, and Historical Developments”.  The title says it all really.  This is a must have book for anyone looking to do serious research on the topic, or a very good place to jump off from.  From the articles in the text I was able to come to some broad conclusions regarding the nature of surface treatment in ancient times.  The following is a dilution of the information I was able to glean from the above book.
  1.   Metals were not often patinated deliberately in pre-classical times: By this I mean that the method of patination we are accustomed to today, with application of solutions that quickly alter to color of the metal, were not in use.  The Romans were quite fond of polished bronze as a finish, though were well aware of the tendency of bronze to acquire a different color and surface with time.  Many of the first hand accounts of techniques of the time come from Pliny the Elder, who details some techniques for protecting the surface of bronze.  In western culture, it was only during the Renaissance that patination became a standard, and that was simply to imitate the state of Greek and Roman bronzes rather than to innovate new colorations.  At that time, and long before, the natural color of bronze was considered to be black, so it was a very popular surface to emulate. 
  2. Patinas were influenced primarily by metal chemistry, and not surface treatments: This detail was quite shocking for me to learn, as it seems counterintuitive, but realizing that the production of alloys in the first place was a craft lends credence to this.  Nowadays, we buy industrially produced alloys, which, by nature of the industrial system, limits what is available to us.  Ancient metal casters suffered no such restriction, and could pay for and request certain alloys to achieve the results they desired over time.  Silver and gold were popular additions to copper alloys, as they would cause a purple-black patina to occur with the right chemistry.  This is especially true with the Japanese, who pioneered still famous alloys like shakudo (a copper alloy with gold additions) and shibuichi (a copper alloy with up to 25% silver added).  This brings me to my next point…
  3.  Of all known cultures, the Japanese have the most prolific and well documented tradition in the coloring of metals: The pure range of colors they were able to achieve by changing the alloy chemistry is amazing and, counter to my comment earlier, they pioneered chemical surface treatments of all kinds.  These techniques are still in use and produce rather stunning results.

    My intention from this point forth is test select treatments from disparate cultures and document the results and the ingredients used.  My creation process will be designed so that mass production is possible and I can move to the metal finishing process quickly.  The next form up in line is a rams horn, which I'll take a mold of and make as many as I can.  Stay tuned for more!